Synthwave Music Tech Project

Genre-based projects provide a useful set of creative constraints for music tech students. The book Electronic Music School: A Contemporary Approach to Teaching Musical Creativity by Ethan Hein and Will Kuhn is great resource for getting started with implementing these types of projects. In the book there are ready-to-go plans for a variety of genre projects such as, house, trap, future bass, lofi and vaporwave.

At some point, you’re probably going to need to design your genre-based projects. It’s a good way to keep up with evolving trends or find new ways to connect with the tastes of different students. In their book, Hein & Kuhn have a helpful section called “The Project Formula” that outlines some of key aspects to designing a successful project. In their words, “Music concept + technology concept + fun hook = successful project.” When approaching a genre-based project, most of the music and technology concepts can be brought into focus by identifying some of the key tropes in a particular genre.

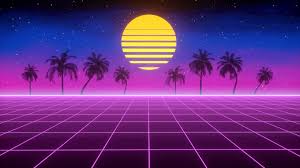
I’ve been wanting to design a synthwave project for awhile and I finally got around to putting it together this year. A lot of students will be familiar with the general sound and aesthetic of synthwave as it gained popularity in the 2000s through videogames such as GTA: Vice City and movies like Drive or shows such as Stranger Things. This can provide a fun hook since students will be working toward creating something they might have familiarity with already or at the very least is going to sound like a complete track.

Another advantage of synthwave music is that it evolved in parallel with the proliferation of DAW’s in the 2000’s, making it a seamless fit for students creating in a classroom where students might be using Ableton, Logic, etc. Ableton, in particular, included the Drift instrument in all of their Live 11 versions, which is an amazing device for approximating retro analog synth sound of the 80’s. If students have access to the Push or MIDI controllers, they can also practice the workflow or recording, quantizing and layering multiple synth parts.

In order to get the project ready for students, I had to pilot creating a synthwave track myself and then build a Live Set project template that could provide some scaffolding for students once they made their own projects. To begin with, I started to a deeper dive on synthwave music and especially listening to more. I liked this Spotify playlist in particular:

After a lot of listening (especially in the car to and from school), I wanted to see how other producers/YouTubers were breaking down how to make a generic synthwave track. There are of course a ton of tutorials out there, but I found this blog post by Native Instruments to be one of the best: What is synthwave music? How to make a synthwave track. I liked this guide because it includes a nice introduction with a brief history and some quintessential listening examples. The post continues with a relatively clear step-by-step process to make in my opinion a convincing and successful sounding synthwave track.

I ended up following most of the steps while adapting the process for use with Ableton Live and the Push. In order to make it work my context, I had to spend some time selecting and editing the devices and sounds I wanted to use in Ableton. First, I built a custom drum rack to evoke a stereotypical 80’s drum sound, complete with gated reverb and some other tweaks to the Ableton stock 707 drums. Next, I went through and created each of the synth tracks from driving bass to sweeping pads and a variety of leads. I was able to make all of the synth sounds by beginning with the different Drift presets and then adjusting from there.

Once the Live Set template was complete I could pilot the project myself and I created a short synthwave song. Overall, I was satisfied with the results and I was convinced that students could create their own successful projects with the help of the Template Live Set and a guide.

For my project guide, I decided to build it using Craft which I’ve become a huge fan of this year. I had the guide include a brief introduction with listening examples, followed by step-by-step instructions with embedded YouTube videos of how to make the different elements. I adjusted some of the instructions from the Native Instruments guide, such as giving students more general guidelines for coming up with their synth patterns rather than note-for-note prescriptions.

One final note is that the project was targeted toward middle school students who were in their first year Music Tech class, but in the second semester–having already completed several projects using Ableton, Push and following project guides independently or in groups.

You can listen here to what one student made using the template and guide:

Check out the synthwave guide yourself and let me know what you think.

Or download the Ableton Synthwave Template and get started making your own track
Ableton Effect Rack

I have some students who are going to do some live DJ-ing at a school fine arts event this Spring. I wanted them to have an effect rack they could use to have some fun while performing with Ableton Live Intro and Push. I wasn’t satisfied with the preset effect racks in Live, and one of my favorite ones, eightKNOBS, doesn’t work with Live Intro.

I created my own effect rack with eight different effects: Crush, Low, High, Space, Chop, Chaos, Squeeze, and Phase. You can download the effect rack below.


Also, this video by LNA Does Audio Stuff is helpful if you want to explore making your own effect rack.

Chiptune Music

I just finished a project with my middle school music tech students, which had them making their own chiptune themes. I really enjoyed the process of testing out the project myself, as well as hearing what the students made. I think it’s an effective music tech project for a couple reasons. First, you can setup the project in a way to provide the students with a framework of useful creative constraints to guide the process. Additionally, many of the students are active gamers or at least have a cursory experience with videogames, so the chiptune style and sound pallette is familiar and creatively inspiring.

You can find a basic definition of chiptune music on Wikipedia:
“Chiptune, also known as chip music or 8-bit music, is a style of synthesized electronic music made using the programmable sound generator (PSG) sound chips or synthesizers in vintage arcade machines, computers and video game consoles.”

As you listen to and read more about chiptune music, it becomes clear that style is “more about the choice of instrumental sounds, timbres and the methods of production.” In other words, any type of genre or song could be produced in a chiptune style. This point is really helpful when teaching the project because it can allow students to bring a variety of genre preferences to the chiptune music they create. Also, a quick Google search reveals there is a variety of chiptune music being created and the style has evolved in many ways beyond its videogame based roots.

For this particular project though, I like to begin with connecting chiptune music in its association with video game original soundtracks (OSTs). According to Wikipedia, the first video game to feature continuous melodic background music was Rally-X, an arcade game released by Namco in 1980.

I think it’s also a good idea to spend some time having students listen to some of the iconic Nintendo songs from the 8-bit era, and sharing some of their own favorites. One of my own favorites to listen to and discuss is “Eternal Wind” from Final Fantasy III.

The 8-bit era songs a great for asking the students some questions to draw their attention toward characteristics that will be helpful when they begin creating their own music. For example, I begin with three basic questions:
– What mood does the music evoke?
– How many different sounds/parts do you hear?
– What is each sound doing? How does it change over time?
Depending on the feedback from the student, you might have to adjust to ask more specific or general questions. Some of the goals of these questions are to draw students’ attention to the affective qualities of music, the roles of the different parts (e.g. lead melody and accompaniment), and the structure or form of the music (many of the 8-bit era use a simple ABA form) .

Moving on from there, we start talking about how the students will make their own chiptune style music. I recommend that first the students think about what type of mood they want to aim for with their music. Is the music going to evoke the peaceful exploration, the beginning of an adventure, an intense boss battle?

Then, I provide students with an Ableton Live Set that has three tracks and two scenes set up in Session View. There are two chiptune synth tracks which feature a stock Ableton synth “Vintage Saw Keys” + Redux device. The third track is a drum rack of 8-bit drum samples. The two scenes are labelled A and B to help organize the form of the music after the initial clips of ideas are made. No Ableton Live? Try using Beepbox.co which is web-based and works on Chromebooks.

The basic goal of the project is for the students to create a chiptune track that evokes a coherent mood with both a melody and accompaniment, and arranged in ABA song form. I give the students structured guide that they can follow as they move through the creative process, so that by the end they hopefully have a baseline level of successful sounding project. They begin by creating an “A scene” of a four bar melody with a synth or drum accompaniment, followed by a “B scene.” Once they have the Session View organized and sounding good, they can move to the Arrangement View quickly making a form: Intro – A – B – A – B – A – Outro. I also end up spending a lot of time throughout the duration of the project listening and giving feedback to students a long the way, whether it be about certain musical elements or Ableton-specific production techniques.

You can click below to download the Ableton template project that I created.

And my own demo project here:

More beatmaking resources

As way of organizing some resources for a beatmaking class I’m teaching I came up with the following categories: Technical Knowledge (organized by DAW), Musical Understandings, and Creative Techniques.

This post is a work in progress, so check for more updates and revisions as I do more research.

Technical Knowledge

Ableton
Garageband
iMaschine 2

Musical Understandings

Creative Strategies

Creative Strategies

Ableton has an excellent book called Making Music: 74 Creative Strategies for Electronic Music Producers. You can read sample chapters from the book HERE.

The sample chapters are more than enough to get you started, and it has some great tips which address problems of starting, progressing, and finishing tracks.

If you don’t have time to check out the book, try this exercise to get you started using any DAW or beatmaking app:

  • Select any tempo and make a 2 bar drum loop. You can use a sequencer, MIDI piano roll, or live play it on your keyboard/drum pad–just do whatever is easiest for now.
  • When making your drum loop start with the lowest pitch first–the bass/kick drum. Then add the snare/clap, and then the hihat/shaker.
  • Add any other percussion (e.g. toms, crash etc.) you want to create variation or fills.
  • Use this drum loop as the foundation for adding/recording the other layers of your track.
  • Later you can duplicate the drum loop and create sections for an arrangement by muting/removing certain parts of your drum loop or adding other percussion/fills.

Remember to have fun and don’t overthink the beginning process. Keep your ears open and follow new ideas as you start to hear them.

Points of Departure

This is a general way you can get started making beats across different platforms or software.

This is just an example so feel free to experiment along the way to find the workflow that works best for you.

Begin by building you band or creating a template. One example is to simply choose a drum kit or drum rack, keyboard/guitar sound (something that can play chords), and a lead or bass sound. As you get more comfortable with the process you can expand or vary your templates.

  • Don’t over analyze for the perfect sound at first. You can often edit/change this later especially if you’re using soft synths or MIDI. This is mostly a way to begin getting musical ideas down.

Next you will start creating patterns, layers, and loops with your sounds.

    • Get a sketch going of a 1, 2, 4, or 8 bar pattern.
      • If live playing is difficult, try using a step sequencer, MIDI roll, or note repeat feature to make a simple beat (drums), a chord progression (keys/guitar), or a bass/lead.
        • Don’t worry about which sound you start with, just rely on your strengths or what comes naturally
    • Layer additional sound elements without thinking too much, just follow your instincts and what sounds interesting to you.
      • After the initial parts are established, try switching between sequencing, MIDI writing, and live playing.
    • Once you have a decent amount of material begin muting and unmuting different sounds (or switching patterns) while the loop is playing, to hear for a possible arrangement, themes, or sections
      • Listen for how certain layers sound together, and what ideas emerge within and across sounds
      • When you start arranging you can duplicate your patterns and loops, and then sculpt out certain parts to build your track.

Beatmaking Class Resources

Free sites for making beats:

Links to tech/gear we’re using in class:

Learn more about beatmaking and music:

Free sample packs, loops, etc:

Videos:

Listening:

Soulection Soundcloud Station

Classic Drum Breaks

Spotify Playlist